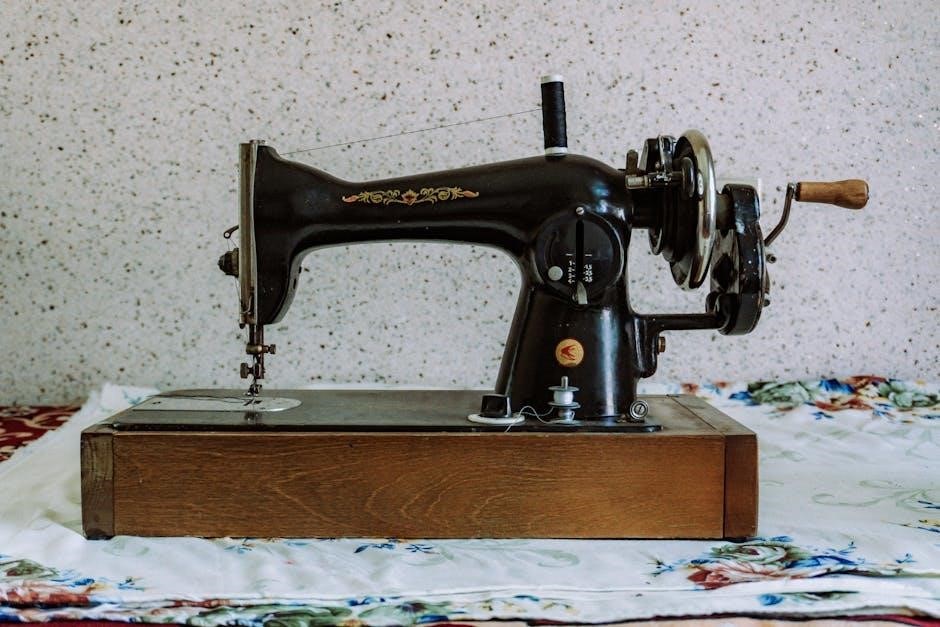
Singer 99K Sewing Machine Manual: A Comprehensive Guide
This manual delves into the iconic Singer 99K sewing machine, offering detailed insights into its history, operation, maintenance, and available resources.
Discover how to unlock the full potential of this classic machine, ensuring years of reliable sewing enjoyment and creative expression.
Historical Context of the Singer 99K
The Singer 99K emerged during a pivotal era for the Singer Sewing Machine Company, building upon Isaac Singer’s 1851 patent for the first practical sewing machine. Introduced as a portable electric model, the 99K quickly gained popularity for its versatility and robust construction. It represented a shift towards more accessible and user-friendly sewing technology, catering to both domestic and professional users.
Production spanned several decades, with variations manufactured in both the United States and Scotland – the latter denoted by the “K” designation. This Scottish production continued for a significant period, offering identical functionality to its American counterparts. The 99K’s enduring appeal stems from its ability to handle a wide range of fabrics and sewing tasks, solidifying its place as a beloved machine among sewing enthusiasts and collectors. Its historical significance lies in its contribution to the democratization of sewing, empowering individuals with the ability to create and repair garments efficiently.
The 99K’s Place in Singer’s History
The Singer 99K occupies a unique and respected position within the extensive Singer sewing machine lineage. It wasn’t a revolutionary departure, but rather a refinement of existing technology, embodying Singer’s commitment to practical design and reliable performance. Following earlier models, the 99K became a cornerstone of Singer’s portable electric line, offering a balance of features and affordability that resonated with a broad customer base.
Its longevity in production – spanning numerous years and manufacturing locations – speaks volumes about its enduring quality and popularity. The 99K bridged the gap between earlier, simpler machines and the more complex models that followed, representing a sweet spot for many sewists. Even today, its robust build and readily available parts contribute to its continued use and collectibility. The machine’s legacy is further cemented by the wealth of online resources and support communities dedicated to its preservation and operation, ensuring its story continues for generations.
Key Features and Specifications of the 99K
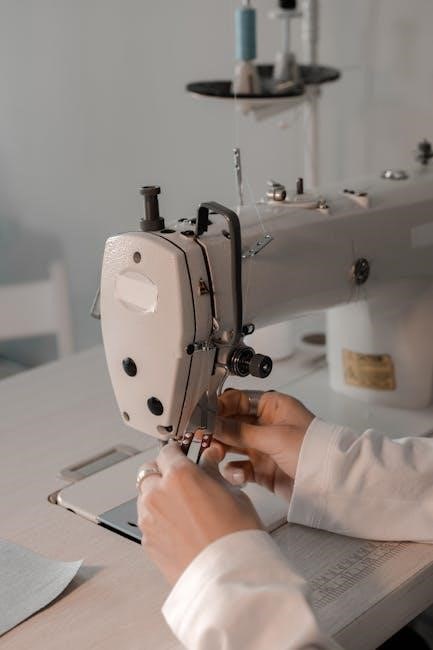
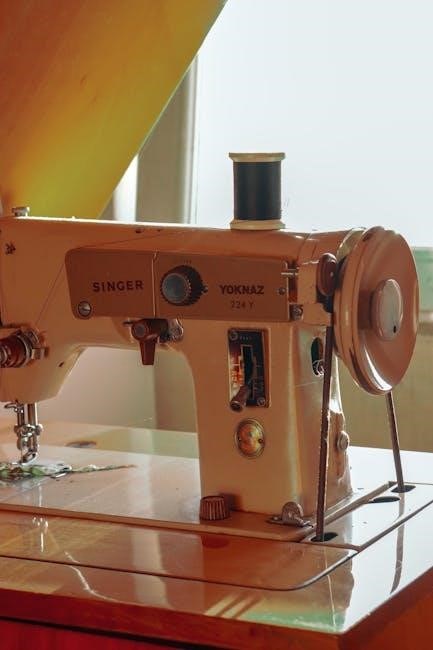
The Singer 99K boasts a robust, yet relatively lightweight construction, making it a truly portable and versatile machine. It’s a zig-zag machine, offering a range of stitch options beyond the standard straight stitch, enhancing its capabilities for decorative sewing and handling various fabric types. Powered electrically, it delivers consistent and reliable performance.
Key specifications include a free-arm design for easy cuff and sleeve sewing, and a built-in reverse mechanism for secure stitch finishing. The machine accepts standard 15×1 needles, ensuring easy access to replacements. While specific motor horsepower varies slightly depending on the production year, the 99K consistently provides ample power for typical household sewing tasks. Notably, versions designated with a “K” were manufactured in Scotland, though functionally identical to their US-made counterparts. Its simplicity and durability remain defining characteristics, making it a favorite among vintage sewing enthusiasts.
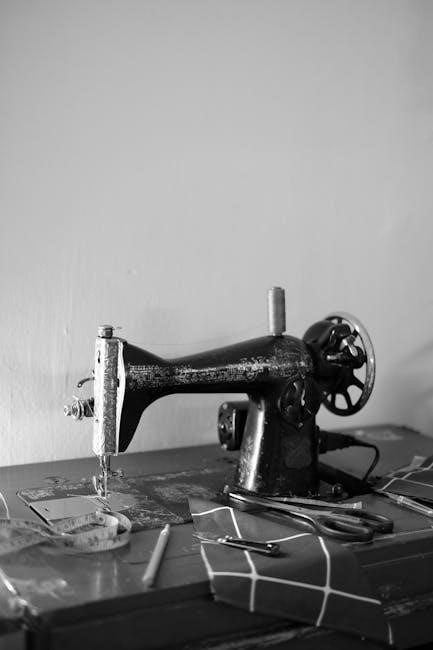
Understanding the 99K Components
Dissecting the Singer 99K reveals a cleverly engineered machine. Familiarizing yourself with each part – from the bobbin winder to the tension assembly – is crucial for effective operation and maintenance.
Identifying Major Parts: A Visual Guide
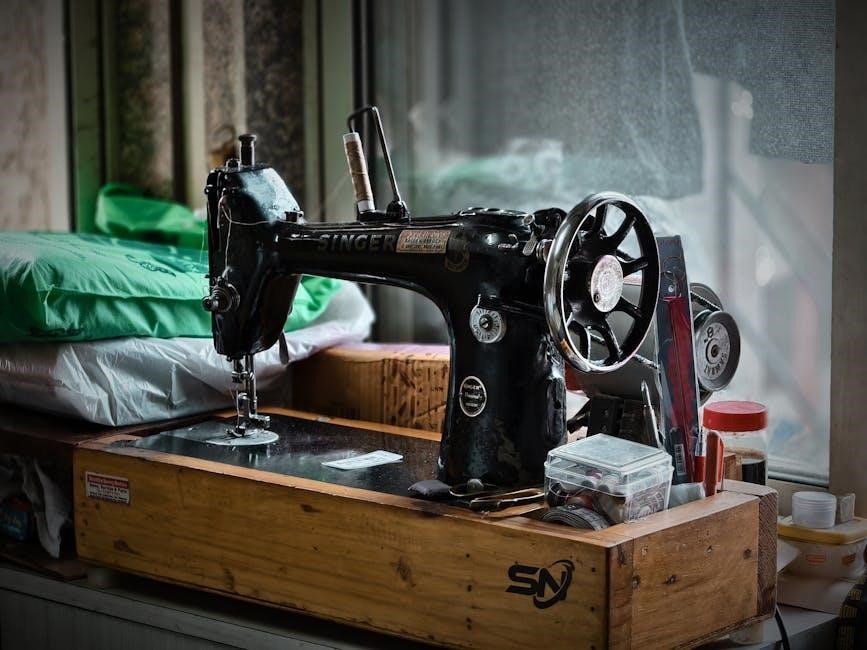
The Singer 99K, while seemingly complex, comprises distinct, identifiable components. Key areas include the handwheel, used for manual control, and the motor housing, encasing the electrical components. The needle clamp securely holds the needle, while the presser foot applies pressure to the fabric during sewing.
Observe the feed dogs, responsible for advancing the fabric, and the bobbin case, housing the lower thread. The tension discs regulate thread tension, crucial for stitch quality. The spool pin holds the thread spool, and the bobbin winder prepares bobbins for use.
Understanding the function of each part – like the clutch knob releasing during bobbin winding to prevent needle movement – is vital. A visual guide, often found in manuals (like those available on Ismacs.net), will aid in quick identification. Recognizing these elements facilitates troubleshooting and maintenance, ensuring your 99K operates smoothly.
The Bobbin Winding Mechanism
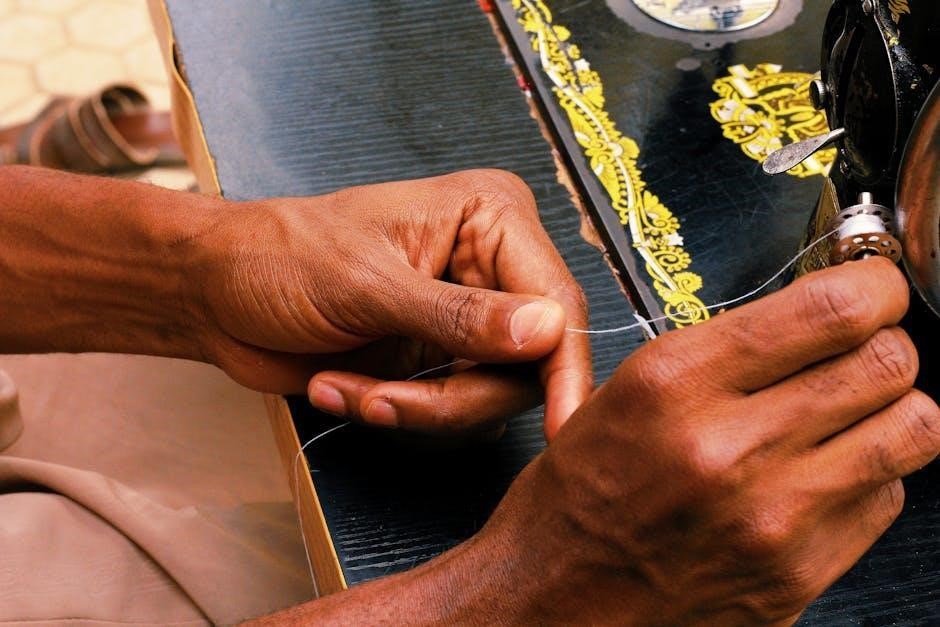
The Singer 99K’s bobbin winding system is ingeniously designed for efficiency. Begin by placing the thread spool on the spool pin and guiding the thread through the designated tension discs. Next, thread the end through the bobbin winder guide and onto the bobbin itself.
Secure the bobbin onto the bobbin winder spindle. Engaging the bobbin winder by moving the lever initiates the winding process. Crucially, releasing the clutch knob during winding prevents the needle from moving up and down, minimizing wear and tear and allowing for faster winding speeds.
Ensure even winding by monitoring the bobbin’s fill level. Once complete, disengage the bobbin winder and remove the full bobbin. Proper bobbin winding is fundamental to consistent stitch formation. Refer to online resources, such as the manuals found on Ismacs.net, for detailed visual instructions.
Tension Assembly and its Function
The tension assembly on the Singer 99K is critical for balanced stitch formation. It controls the amount of upper thread tension, working in harmony with the bobbin tension to create a secure stitch. The assembly features tension discs and a spring, often referred to as the “beehive spring,” which regulates thread pressure.
Issues like looping or knotting on the underside of the fabric frequently indicate incorrect upper tension. A worn or weakened beehive spring is a common culprit, requiring replacement. Cleaning the tension discs is also vital, as lint and debris can disrupt smooth thread flow.
Adjusting the tension involves turning the tension knob; tighter settings increase tension, while looser settings decrease it. Experimentation and test sewing are key to finding the optimal setting for your thread and fabric combination. Resources like user forums often recommend a new upper tension spring to resolve persistent tension problems, as highlighted by experienced users discussing the 15-91 model.
Operating the Singer 99K
Mastering the Singer 99K involves precise threading, bobbin winding, and stitch selection. Releasing the clutch during bobbin winding minimizes wear, while proper tension ensures beautiful stitches.
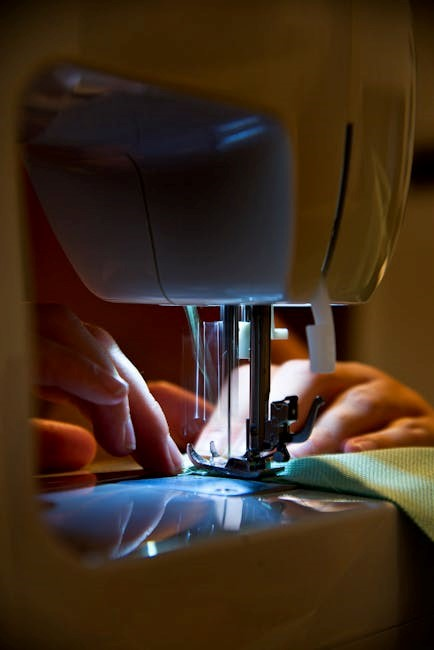
Threading the Machine: Step-by-Step Instructions
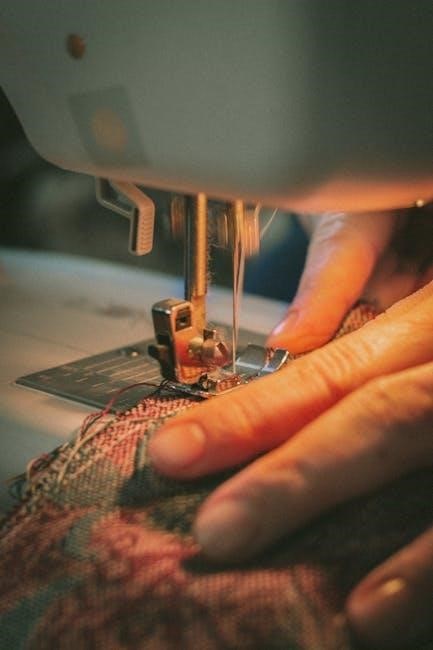
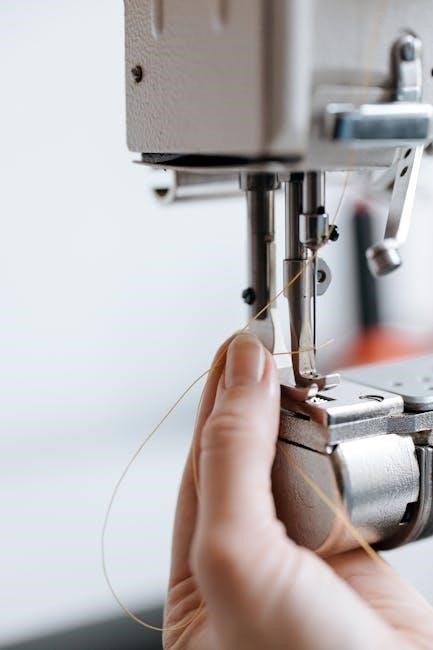
Successfully threading your Singer 99K is crucial for optimal performance. Begin by ensuring the machine is unplugged and the presser foot is raised. Place the spool of thread on the spool pin. Guide the thread through the first thread guide, then down and around the tension discs – this is a critical step for proper tension control.
Next, lead the thread up and through the take-up lever, ensuring it’s securely seated. Continue threading through the second thread guide and then down to the needle clamp. Finally, thread the needle from front to back.
Remember to always pull a sufficient length of thread through the needle – approximately 3-4 inches – before beginning to sew. Proper threading, combined with a correctly wound bobbin, will significantly reduce issues like looping or knotting. Double-check each step to guarantee a smooth and efficient sewing experience with your vintage Singer 99K.
Winding the Bobbin Correctly
Proper bobbin winding is essential for consistent stitch quality on your Singer 99K. Begin by placing the bobbin on the bobbin winder spindle. Attach the thread end to the bobbin, ensuring a secure start. Engage the bobbin winder by sliding it to the right.
Crucially, release the clutch knob – this prevents the needle from moving up and down during winding, reducing wear and tear and allowing for faster winding speeds. Gently depress the foot pedal to begin winding. Monitor the bobbin as it fills, stopping when it’s nearly full to prevent overflow.
Once full, disengage the bobbin winder and clip the thread. Remember to insert the wound bobbin into the bobbin case with the thread unwinding in the correct direction. A well-wound bobbin, combined with correct threading, will contribute significantly to a trouble-free sewing experience with your Singer 99K.
Stitch Selection and Adjustment
The Singer 99K offers a range of stitch options, primarily focused on straight stitch functionality, though variations exist depending on the specific model year. Stitch length is adjusted using a dedicated dial or lever, typically located on the front of the machine. Experiment with different stitch lengths to achieve the desired result for various fabrics and applications.
While the 99K doesn’t feature a wide array of built-in stitches like modern machines, its simplicity allows for precise control over the fundamental straight stitch. Mastering stitch length adjustment is key to achieving professional-looking seams. Remember to test your stitch settings on a scrap piece of fabric before beginning your project.
Fine-tuning tension is also crucial for optimal stitch formation. The upper tension dial controls the thread tension from the spool, while the bobbin tension (less frequently adjusted) affects the underside of the stitch. Proper tension balance ensures a balanced and secure seam.
Maintenance and Troubleshooting
Regular cleaning and oiling are vital for the Singer 99K’s longevity. Addressing looping or knotting often involves a new upper tension beehive spring or a sharp needle replacement.
Regular Cleaning and Oiling Procedures
Maintaining your Singer 99K involves consistent cleaning and lubrication to ensure smooth operation and prevent wear. Before oiling, always disconnect the machine from the power source. Begin by removing the bobbin case and thoroughly cleaning the bobbin area with a small brush to remove lint and debris.
Next, gently brush around the feed dogs and the needle plate. For stubborn lint, a slightly dampened cloth can be used, ensuring it’s not dripping wet. Apply sewing machine oil sparingly to all moving parts – the motor, gears, and linkages. Focus on points where metal rubs against metal.
A drop of oil on the bobbin winder shaft and the tension discs is also beneficial. Avoid over-oiling, as excess oil attracts dust. After oiling, run the machine briefly to distribute the lubricant. Wipe away any excess oil with a clean cloth. Regular cleaning, ideally after each use, and oiling every few months will significantly extend the life of your Singer 99K.
Common Problems and Solutions (Looping/Knotting)
Looping or knotting, particularly on the underside of the fabric, is a frequent issue with the Singer 99K, often stemming from tension imbalances. First, re-thread the upper thread, ensuring it’s correctly seated in the tension discs. Verify the bobbin is wound evenly and inserted correctly with the thread flowing in the right direction.
A common culprit is a worn or dirty upper tension beehive spring; replacing this small component often resolves the problem. Clean the tension discs thoroughly, as lint buildup can disrupt proper tension. Ensure you’re using the correct needle type and size for your fabric. A dull or damaged needle can also cause looping.
Finally, check the bobbin tension – it should be snug but not overly tight. If problems persist, try a test stitch on a scrap fabric to fine-tune the upper tension screw. Remember small adjustments make a big difference!
Replacing the Upper Tension Beehive Spring
A frequently recommended fix for looping or knotting issues on the Singer 99K is replacing the upper tension beehive spring. This small, yet crucial component, loses tension over time, impacting stitch quality. Begin by loosening the screw holding the tension assembly together. Carefully remove the tension discs and the old spring – note its orientation for correct reassembly.
A new spring can be sourced from sewing machine parts suppliers online. Gently insert the new spring, ensuring it sits correctly within the tension assembly. Reassemble the tension discs, making sure they are aligned properly. Tighten the screw securely, but avoid over-tightening.
After replacement, test the machine with scrap fabric and adjust the upper tension screw as needed to achieve balanced stitches. This simple procedure often dramatically improves the 99K’s performance, restoring its smooth and reliable operation.
Resources and Manuals
Numerous online resources offer support for the Singer 99K. Ismacs.net provides downloadable manuals, while online communities offer advice and assistance with troubleshooting and repair.
Accessing Online Manuals (Ismacs.net)
Ismacs.net is an invaluable resource for Singer 99K owners seeking original manuals and documentation. This website hosts a comprehensive archive of Singer sewing machine manuals, including specific versions of the 99K. You can find detailed guides covering operation, maintenance, and troubleshooting directly from the source;
Currently, Ismacs.net features at least two readily accessible manuals for the Singer 99K: one is a general manual for the model 99, and the other is specifically for the portable electric sewing machine, designated as 99-13. These PDFs are freely downloadable and offer a wealth of information for both beginners and experienced users.
These manuals provide step-by-step instructions, diagrams, and explanations to help you understand every aspect of your machine. Whether you need assistance with threading, bobbin winding, stitch selection, or resolving common issues, Ismacs.net is an excellent starting point for finding the answers you need to keep your Singer 99K running smoothly.
Understanding “K” Designation (Scottish Made Versions)
The “K” designation appended to some Singer 99 models simply indicates that the machine was manufactured in Singer’s Scottish factory, located in Kilmarnock. This designation doesn’t signify any functional or mechanical differences compared to the Singer 99s produced in the United States.
From a user’s perspective, the Scottish-made “K” versions are essentially identical to their American counterparts. The internal components, functionality, and overall sewing experience remain consistent regardless of the country of origin. Therefore, manuals and parts intended for US-made 99s are generally compatible with the “K” models.
Don’t be concerned if you encounter a Singer 99K with a “K” in its model number; it doesn’t imply a lesser quality or require specialized maintenance. It’s purely a geographical indicator of where the machine was assembled. Owners can confidently utilize resources and parts designed for the standard Singer 99, knowing they will fit and function correctly.
Additional Online Support Communities
Beyond official manuals, a vibrant community of Singer 99K enthusiasts thrives online, offering invaluable support and shared knowledge. These forums and groups provide a platform to connect with experienced users, troubleshoot issues, and discover helpful tips and tricks.
Numerous online forums are dedicated to vintage sewing machines, with dedicated threads specifically addressing the Singer 99K. These spaces allow users to post questions, share restoration projects, and exchange information about parts sourcing and repair techniques. Active members often possess extensive knowledge and are eager to assist fellow owners.
Social media platforms also host several Singer 99K groups, fostering a sense of community and providing a convenient way to seek advice or showcase sewing projects. Engaging with these communities can significantly enhance your ownership experience, offering a wealth of practical guidance and encouragement. Don’t hesitate to join and participate!