Welcome to the comprehensive guide for assembling and using the Jenny Lind Crib. This manual ensures safe and proper setup‚ covering all essential steps and safety tips.
1.1 Overview of the Jenny Lind Crib
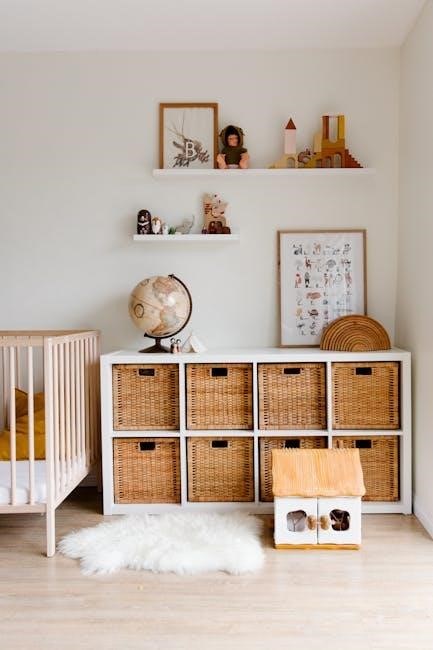
The Jenny Lind Crib is a 3-in-1 convertible crib known for its classic spindle design and versatility. It transitions from a crib to a toddler bed and daybed‚ offering long-term value. Crafted with safety and style in mind‚ it features a sturdy construction and timeless aesthetic‚ making it a popular choice for nurseries. Its design allows for easy customization to fit various decor styles.
With included wheels for mobility‚ the crib ensures convenience while maintaining stability. It adheres to strict safety standards‚ ensuring a secure environment for infants and toddlers. The crib’s compact footprint and adjustable features make it a practical and charming addition to any nursery‚ blending functionality with a vintage-inspired look that appeals to many parents.
1.2 Importance of Following Assembly Instructions
Following the assembly instructions for the Jenny Lind Crib is crucial for ensuring your child’s safety and the product’s durability. Proper assembly prevents structural issues‚ potential hazards‚ and ensures all safety features function correctly. Failure to follow instructions can lead to instability‚ safety risks‚ or damage to the crib. Always read and adhere to the provided manual to guarantee a secure and functional setup for your baby.
Safety Warnings and Precautions
Always adhere to safety guidelines to prevent accidents. Stop using the crib when the child can climb out or reaches 35 inches. Avoid soft bedding and ensure proper assembly.
2.1 General Safety Guidelines
Ensure the crib is used safely by following essential guidelines. Stop using it when the child can climb out or reaches 35 inches. Avoid soft bedding like pillows or comforters to prevent suffocation. Use a mattress that fits snugly‚ with no gaps exceeding 3cm. Keep the crib away from windows‚ curtains‚ or cords to avoid entanglement hazards. Regularly check for loose parts and tighten them as needed.
2.2 Specific Warnings for Assembly and Use
Avoid substituting parts during assembly and use only non-toxic finishes if refinishing. Never overload the crib or use it near windows or curtains. Ensure the mattress fits perfectly‚ with gaps no more than 3cm. Keep all bedding simple and tight-fitting to prevent suffocation risks. Always follow the instructions precisely to guarantee your child’s safety and the crib’s stability.
Assembly Instructions
Start by carefully unpacking all components and hardware. Follow the step-by-step guide to ensure proper assembly. Use the provided tools to secure parts tightly and accurately;
3.1 Step-by-Step Assembly Process
Begin by assembling the crib frame using the Allen wrench. Attach the side panels securely‚ ensuring all bolts are tightened. Next‚ install the mattress support and slats. Finally‚ attach the wheels for mobility. Double-check all connections for stability and safety. Follow the manual closely to avoid errors and ensure a sturdy structure for your baby’s comfort and security.
3.2 Tools and Materials Required
To assemble the Jenny Lind Crib‚ you’ll need an Allen wrench‚ bolts‚ and screws provided in the packaging. Additional tools like a screwdriver may be helpful. Ensure all parts‚ including side panels‚ mattress support‚ and slats‚ are included. Refer to the instruction manual for a complete list of components. Double-check that all materials are accounted for before starting assembly.
Cleaning and Maintenance
Clean the crib with a soft‚ damp cloth‚ avoiding harsh chemicals. Regularly inspect and tighten bolts for safety and durability; Store instructions for future reference.
4.1 Cleaning Surfaces and Hardware
Clean the Jenny Lind Crib with a soft‚ dry or slightly damp cloth to avoid damage. Avoid using abrasive cleaners or harsh chemicals‚ as they may harm the finish. Regularly wipe down all surfaces‚ paying attention to hardware and crevices where dust accumulates. This maintains the crib’s appearance and ensures a safe environment for your child.
4.2 Periodic Checks and Tightening
Regularly inspect the crib for loose bolts or hardware. Tighten all connections as needed to ensure stability and safety. Check the mattress support and sides for proper alignment. Keep the assembly instructions attached to the mattress support for easy reference during maintenance. Addressing any issues promptly helps maintain the crib’s structural integrity and ensures a secure environment for your child.
Decorating and Styling the Crib
Transform your Jenny Lind Crib into a charming centerpiece by choosing a harmonious color scheme and adding cozy bedding. Soft pastels or muted tones enhance its classic design‚ creating a warm and inviting space for your baby.
5.1 Choosing a Color Scheme
Selecting a color scheme for your Jenny Lind Crib involves balancing aesthetics with functionality. Opt for soft pastels or muted tones like pale pink‚ sage green‚ or cream to complement its classic design. Neutral shades such as white‚ gray‚ or beige also work well‚ creating a serene and timeless look. Ensure the colors align with your nursery’s decor while reflecting your personal style for a harmonious and inviting space.
5.2 Adding Bedding and Accessories
Adorn your Jenny Lind Crib with cozy bedding that complements its classic design. Use a firm‚ tight-fitting mattress and lightweight‚ breathable bedding to ensure safety. Avoid soft items like pillows‚ blankets‚ or bumpers‚ as they can pose suffocation risks. Consider adding a crib skirt for a stylish touch‚ ensuring it fits snugly without obstructing the crib’s functionality. Keep accessories minimal to maintain a safe and charming environment for your baby.

Converting the Crib
The Jenny Lind Crib offers versatile conversion options‚ transitioning into a toddler bed or daybed. Follow the provided instructions for a smooth and safe conversion process.
6.1 Conversion Options (Toddler Bed‚ Daybed)
The Jenny Lind Crib transitions seamlessly into a toddler bed or daybed‚ adapting to your child’s growth. The toddler bed option removes the front rail‚ while the daybed conversion offers a comfortable resting place. Both configurations maintain the crib’s classic design and ensure a smooth transition for your child without compromising on style or safety.
6.2 Instructions for Conversion
To convert the Jenny Lind Crib‚ remove the front rail for a toddler bed or attach the daybed conversion kit. Ensure all bolts are securely tightened for stability. Follow the manufacturer’s guidelines for proper alignment and safety. Regularly inspect the conversion hardware and consult the manual if unsure about any step to ensure a safe transition for your child.

Mobility and Wheels
The Jenny Lind Crib features wheels for easy mobility‚ allowing parents to move it effortlessly. Ensure wheels are locked to maintain stability and safety.
7.1 Using Wheels for Easy Movement
The Jenny Lind Crib is equipped with wheels designed for smooth mobility‚ allowing easy repositioning without disassembling the crib. To ensure safety‚ always lock the wheels when the crib is stationary to prevent unintended movement. This feature is particularly useful for parents who need to move the crib between rooms or adjust its position within the nursery. Regularly check the wheels for proper function and clean them to maintain ease of movement. Ensure the crib is placed on a stable‚ flat surface‚ and avoid leaving it near stairs or sharp edges. When moving the crib‚ grasp it firmly to guide it smoothly‚ especially when occupied‚ to prevent any imbalance. The wheels are suitable for most floor types‚ including hardwood and carpet‚ but avoid placing the crib on uneven surfaces. If a wheel becomes jammed or difficult to maneuver‚ inspect for debris and clean as needed. Lubrication is generally not required‚ but if wheels become stiff‚ a silicone-based spray can be used sparingly. Always refer to the manufacturer’s guidelines for any maintenance or repairs to ensure the crib’s stability and your baby’s safety.
7.2 Ensuring Stability
Ensuring the Jenny Lind Crib’s stability is crucial for your baby’s safety. Always lock the wheels when the crib is stationary to prevent movement. Regularly inspect and tighten all bolts and connections to maintain structural integrity. Place the crib on a flat‚ stable surface‚ away from uneven areas or hazards. Avoid overloading the crib with heavy bedding or accessories‚ and ensure the mattress fits snugly within the frame. Periodic checks will help maintain the crib’s stability and safety over time.
Troubleshooting Common Issues
Troubleshoot common issues like loose bolts or wobbly parts by tightening hardware. Ensure all parts are securely attached and double-check assembly steps. Address safety concerns promptly to prevent hazards.
8.1 Identifying and Solving Assembly Problems
Identify assembly issues by checking for loose bolts or misaligned parts. Ensure all hardware is securely tightened and parts are correctly aligned. If a piece doesn’t fit‚ review the instructions or consult the manual. For unclear steps‚ refer to online guides or videos. Contact customer support if problems persist. Regular checks can prevent future assembly-related issues.
8.2 Addressing Safety Concerns
Address safety concerns by ensuring all bolts are tightly secured and no gaps exceed 3cm. Stop using the crib if your child can climb out or reaches 35 inches. Avoid adding soft bedding or pillows. Regularly inspect for loose parts and tighten as needed. Use only non-toxic finishes if refinishing. Always follow assembly instructions to prevent hazards and ensure a safe environment for your child.

Additional Resources
Access the Jenny Lind Crib user manual online or download the PDF for detailed instructions. Visit the manufacturer’s website for guides‚ videos‚ and customer support at 800.967.6696.
9.1 Downloading the User Manual
Download the Jenny Lind Crib user manual from the manufacturer’s website or through the product page. Ensure you have the latest version‚ which includes updated assembly instructions‚ safety guidelines‚ and troubleshooting tips. Save the PDF for future reference and easy access. This manual is essential for proper assembly and safe usage of the crib. Visit DaVinci Baby for the most current guide.
9.2 Accessing Online Guides and Videos
Access online guides and videos for the Jenny Lind Crib through the manufacturer’s official website or retailers like Amazon. These resources provide step-by-step assembly tutorials‚ safety tips‚ and troubleshooting advice. Videos offer visual clarity‚ making complex steps easier to understand. Visit DaVinci Baby or YouTube for comprehensive guides to ensure proper assembly and safe usage of your crib.
Product Features
The Jenny Lind Crib offers a 3-in-1 convertible design‚ transforming into a toddler bed and daybed. It features wheels for easy mobility and a classic spindle design.
10.1 Dimensions and Weight Limits
The Jenny Lind Crib measures approximately 54.8 inches in length‚ 30.5 inches in width‚ and 50.5 inches in height. It has a maximum weight capacity of 50 pounds‚ ensuring safe use for infants and toddlers up to 35 inches tall or when they begin to climb out‚ whichever comes first. Always adhere to these limits for optimal safety.
10.2 Included Accessories
The Jenny Lind Crib comes with essential accessories like wheels for easy mobility and a toddler rail for conversion. Some models include a mattress support panel and hardware for assembly. Additional accessories‚ such as a bed skirt or changing station‚ may be purchased separately. Ensure all included parts are used as instructed to maintain safety and functionality.

Mattress and Bedding Requirements
Choose a mattress no thicker than 15cm for safety. Ensure the gap between the mattress and crib sides is ≤3cm when pushed into the corner.
11.1 Recommended Mattress Size and Thickness
The mattress must fit snugly‚ with a maximum thickness of 15cm to ensure safety. Standard crib mattress size (51.625 x 27.25 inches) is recommended for proper fit and to prevent entrapment risks. Always check the crib’s mattress support for specific sizing guidelines to ensure compatibility and safety for your child.
11.2 Ensuring Proper Fit and Safety
Ensure the mattress fits snugly‚ with gaps no more than 3cm between the mattress and crib sides. Avoid using soft bedding‚ pillows‚ or comforters to prevent suffocation risks. Regularly check for loose bolts and tighten as needed to maintain stability. Always follow the manufacturer’s guidelines for mattress support and bedding to ensure a safe sleeping environment for your child.
By following these instructions‚ you’ve successfully set up your Jenny Lind Crib. Always prioritize safety‚ style‚ and regular maintenance for a secure and charming nursery environment.
12.1 Final Tips for Safe and Stylish Use
Ensure your Jenny Lind Crib remains a safe and stylish centerpiece by periodically checking all bolts‚ using non-toxic finishes‚ and keeping soft bedding minimal. Choose a complementary color scheme and add cozy‚ yet safe‚ bedding to enhance its classic design. Regular maintenance and adherence to safety guidelines will ensure a secure and charming environment for your child.
12.2 Importance of Regular Maintenance
Regular maintenance ensures the Jenny Lind Crib remains safe and durable. Clean surfaces with a soft cloth‚ avoid abrasive cleaners‚ and periodically tighten all bolts. Check the mattress fit to prevent gaps and ensure proper support. Regular checks help identify and address wear and tear early‚ maintaining stability and safety for your child.