Unboxing and Initial Preparation
Start by carefully unboxing your Char-Broil grill, ensuring all components are included. Lay out parts on a soft, protective surface to avoid damage. Organize hardware and accessories for easy access during assembly. Prepare a safe workspace with tools and a clean, flat surface to ensure a smooth setup process.
1.1. Checking the Contents of the Grill Package
Open the box carefully and verify all components against the provided inventory list. Ensure the grill body, burners, grates, hardware, and instruction manual are included. Organize parts to avoid losing small items like bolts or screws. If any items are missing or damaged, contact customer support immediately to resolve the issue before starting assembly. This step ensures a smooth and stress-free setup process.
1.2. Ensuring All Parts Are Included
Thoroughly cross-reference the inventory list with the contents of your Char-Broil grill package. Verify the presence of key components, such as burner tubes, cooking grates, hardware, and the instruction manual. Organize smaller parts, like screws and bolts, in a container to prevent loss. If any items are missing or damaged, double-check the packaging before contacting customer support for assistance. This ensures assembly can proceed without delays.
1.3. Preparing a Safe Workspace for Assembly
Create a safe and efficient workspace by clearing a large, flat area. Protect the surface with a soft cloth or blanket to prevent scratching or damage to grill components. Organize tools like screwdrivers and wrenches within easy reach. Ensure good lighting to avoid accidents and ensure visibility of small parts. Keep children and pets away while assembling to maintain a distraction-free environment. This setup helps ensure a smooth and stress-free assembly process.

Step-by-Step Assembly Instructions
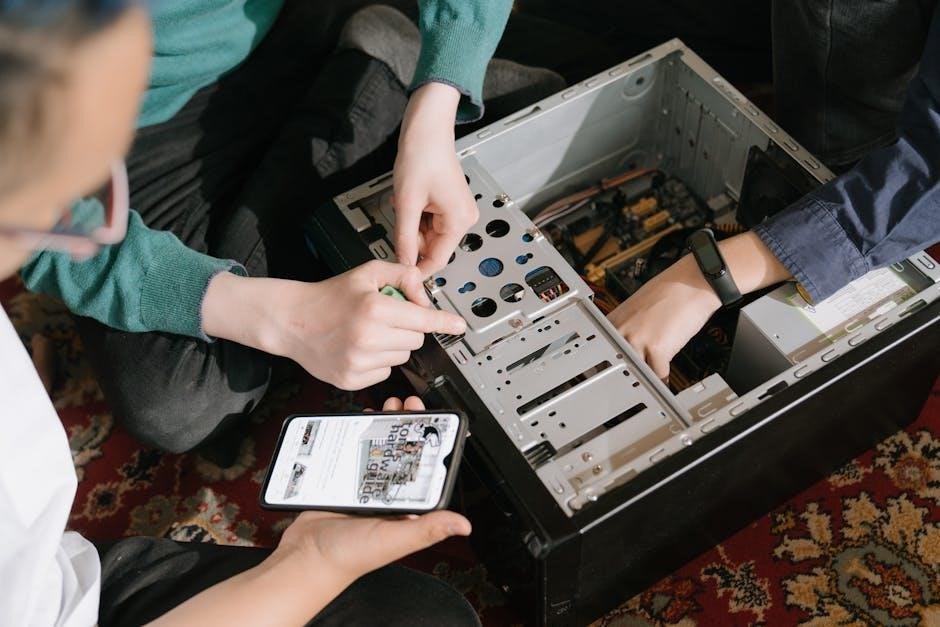
Begin assembly by following the manual’s structured guide, starting with the grill frame and base. Align and secure all components tightly using the provided hardware. Use tools like wrenches and screwdrivers to ensure a stable build. This methodical approach guarantees a safe and functional grill setup for enjoyable grilling experiences.
2.1. Assembling the Grill Frame and Base
Begin by unboxing the grill frame and base. Attach the legs to the frame using the provided bolts, ensuring stability. Align the wheels with the base for easy mobility. Tighten all connections securely with a wrench. Double-check the manual for specific torque settings to avoid overtightening. Ensure the frame is level and sturdy before proceeding to the next assembly steps. Proper alignment is crucial for balanced grill operation.
2.2. Attaching the Burner Tubes and Ignition System
Locate the burner tubes and ignition components. Attach each burner tube to the grill frame, ensuring they align with the burner ports. Secure with the provided screws. Connect the ignition wires to the respective terminals, matching the color codes for accuracy. Tighten all connections firmly but avoid overtightening. Test the ignition by clicking the burner knobs to ensure sparks are present. If no spark, check wire connections or consult the troubleshooting guide.
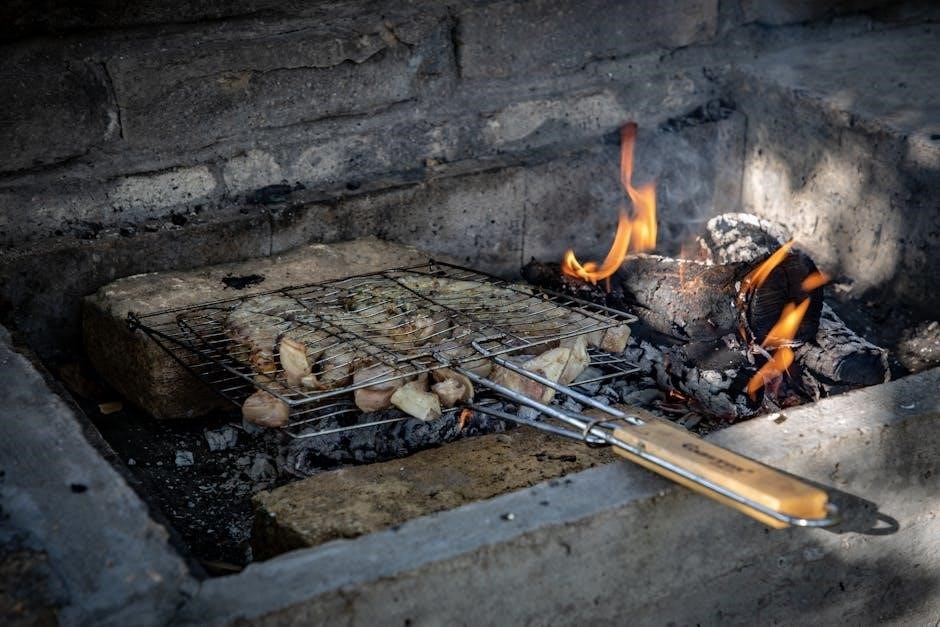
2.3. Installing the Cooking Grates and Heat Deflectors
Position the cooking grates evenly across the grill surface, ensuring they fit securely into the designated slots. Align the heat deflectors over the burner tubes, placing them evenly to distribute heat. Secure the deflectors with the provided hardware, tightening gently to avoid damage. Ensure proper alignment for even cooking performance. Refer to the manual for specific placement instructions to optimize heat distribution and prevent flare-ups during cooking.
2.4. Connecting the Side Burner and Additional Features
Attach the side burner to the grill’s side table using the provided M4x8mm bolts. Ensure the burner aligns with the pre-drilled holes and tighten securely. For additional features like a rotisserie or smoker, follow the manual’s specific instructions. Double-check connections for proper fit and function. If unsure, refer to the manufacturer’s support or online resources for clarification. Ensure all features are installed correctly to avoid performance issues.
Safety Precautions and Warnings
Always wear protective gear and ensure proper ventilation. Follow all gas safety guidelines to prevent leaks or fires. Never modify the grill, as it may void the warranty and create hazards.
3.1. Essential Safety Tips for Assembly
Always wear protective gear like gloves and safety glasses. Ensure a well-ventilated workspace and keep children away. Avoid open flames or sparks nearby. Follow the manual carefully to prevent gas leaks or fire hazards. Never modify the grill as it may void the warranty and create safety risks. Read all warnings and instructions thoroughly before starting assembly.
3.2. Understanding Gas Safety and Leak Testing
Before first use, test for gas leaks by applying soapy water to connections—bubbles indicate leaks. Ensure all hoses are free from cuts or damage. Never use an open flame to check for leaks. Turn off the gas supply immediately if you smell gas. Follow the manufacturer’s leak testing procedure to ensure safe operation. Regular checks help prevent accidental fires or explosions.
3.3. Proper Use of Tools and Protective Gear
Use the correct tools for assembly, such as wrenches and Allen keys, to avoid damaging parts. Wear protective gloves and eyewear to prevent injuries. Ensure a well-lit workspace and keep loose clothing tied back. Organize parts on a soft surface, like a blanket, to protect finishes. Follow the instructions carefully to avoid mistakes. Test connections gently to prevent stripping threads. Keep children and pets away during assembly for safety.
First Use and Maintenance
Preheat the grill to ensure all components are functioning properly. Clean the grates and burners after each use. Regularly inspect and replace worn-out parts. Store the grill securely when not in use, especially during winter months, to maintain its condition and longevity.
4.1. Preparing the Grill for the First Use
Before the first use, preheat the grill to ensure all components function properly. Inspect burner ports for blockages and clean if necessary. Check for gas leaks by applying soapy water to connections—bubbles indicate leaks. Clean grates and burners thoroughly. Ensure all parts are securely tightened. Follow the manufacturer’s safety guidelines to avoid accidents. Proper preparation ensures a safe and efficient grilling experience.
4.2. Lighting the Burners and Testing the Grill
Begin by turning the knob to the “LIGHT” position and pressing the igniter. Ensure the flame is even across all burners. Preheat the grill to high heat for 10-15 minutes to burn off any manufacturing residue. Check for gas leaks using soapy water—bubbles indicate a leak. Test all burners to confirm proper function. If issues arise, consult the manual or contact support for assistance. This ensures a safe and effective grilling experience.
4.3. Regular Cleaning and Maintenance Tips
After each use, clean the grill grates with a wire brush to remove food residue. Wipe down surfaces with a damp cloth and mild detergent. Regularly inspect and clean burner tubes to ensure proper gas flow. Check the drip tray and empty it to prevent grease buildup. Clean flavorizer bars to maintain even heat distribution. For long-term care, store the grill with a protective cover when not in use.

Troubleshooting Common Issues
Troubleshooting common issues ensures your grill operates smoothly. Ignition problems may require cleaning the igniter or replacing the battery. For gas leaks, check connections and tighten securely. If flames go out, reset the burner and ensure proper ventilation. Addressing these issues promptly enhances safety and performance.
5.1. Resolving Ignition Problems
If your Char-Broil grill’s ignition isn’t working, check the igniter for dirt or moisture. Clean the igniter gently with a dry cloth and ensure it’s properly aligned; Verify that the gas supply is turned on and check for blockages in the burner tubes. If issues persist, replace the igniter or consult the manufacturer’s troubleshooting guide for further assistance. Proper ignition is crucial for safe and efficient grilling.
5.2. Fixing Gas Leaks and Connection Issues
To address gas leaks, turn off the gas supply immediately and inspect all connections. Apply soapy water to suspect areas; bubbles indicate a leak. Tighten any loose fittings and replace damaged parts if necessary. Always use authorized replacement parts to avoid voiding your warranty and ensure safety. Properly securing connections and testing after repairs will help prevent future issues and maintain optimal grill performance.
5.3. Addressing Uneven Heating or Flame-Outs
If experiencing uneven heating or flame-outs, check the burner tubes for blockages and clean them gently with a brush. Ensure proper ventilation around the grill and verify that the lid is aligned correctly. If issues persist, inspect the ignition system and replace worn spark electrodes. For persistent flame-outs, consult the manual or contact Char-Broil support for professional assistance to resolve the issue effectively and safely.
Additional Tips for Easy Assembly
Organize parts on a soft surface to avoid damage. Use digital instructions for clarity. If stuck, contact Char-Broil customer support for guidance and troubleshooting assistance.
6.1. Using Digital Assembly Instructions
Digital assembly instructions provide a clear, step-by-step guide for assembling your Char-Broil grill. Access manuals and videos on the Char-Broil website or via PDF downloads. These resources often include detailed illustrations and troubleshooting tips, ensuring a smooth assembly process. Visual guides help clarify complex steps, while digital formats allow for easy zooming and navigation. This method is particularly helpful for first-time assemblers or those who prefer visual learning.
6.2. Organizing Parts Before Starting
Before assembling your Char-Broil grill, organize all parts and hardware on a clean, flat surface. Use a protective covering, like a blanket, to prevent scratching or damage. Label and categorize components to ensure easy access during assembly. Double-check the inventory against the manual to confirm no parts are missing. This step saves time and reduces frustration, ensuring a smooth assembly process from start to finish.
6.3. Seeking Help from Manufacturer Support
If you encounter challenges during assembly, contact Char-Broil customer support for assistance. Their team provides guidance on troubleshooting and assembly questions. Visit their website for digital manuals, FAQs, and support guides. Register your product to track orders and receive updates. Technicians are available to address issues, ensuring your grill is assembled safely and efficiently. Don’t hesitate to reach out for help to guarantee a successful setup.
Optional Features and Accessories
Enhance your Char-Broil grill with optional accessories like rotisserie kits for even cooking, grill covers for protection, and smoker attachments for added flavor. These features elevate your grilling experience.
7.1. Installing a Rotisserie Kit
Installing a rotisserie kit on your Char-Broil grill is an excellent way to achieve even cooking for large meats. Start by attaching the motor bracket to the grill’s side, ensuring it’s securely fastened with provided screws. Next, align the rotisserie spit with the motor and tighten the holding pins. Finally, test the rotisserie by running it without food to ensure smooth operation. This accessory is perfect for cooking whole chickens or roasts evenly. Always refer to the manufacturer’s instructions for specific installation details to avoid any issues.
7.2. Adding a Grill Cover or Smoker Attachment
Protecting your Char-Broil grill with a cover is essential for outdoor storage, shielding it from weather damage. When adding a grill cover, ensure it fits snugly and is made of durable, water-resistant material. For a smoker attachment, mount it according to the manufacturer’s instructions, typically on the side burner area. This enhances your grilling experience by allowing slow-cooking options. Always measure your grill to ensure compatibility with accessories for a proper fit.
7.3. Upgrading with Authorized Replacement Parts
Upgrading your Char-Broil grill with authorized parts ensures compatibility and maintains warranty validity. Replace worn-out components like burner tubes or heat deflectors with genuine Char-Broil parts for optimal performance. Refer to your manual for specific part numbers and installation guidance. Using unauthorized parts can lead to safety risks and void your warranty. Always follow manufacturer instructions to ensure a safe and effective upgrade.
Frequently Asked Questions
- Can I assemble the grill alone? While possible, it’s recommended to have a second person for easier handling of larger parts.
- How long does assembly typically take? Assembly time varies, but most users report 1-3 hours depending on the model and complexity.
- What if I encounter missing or damaged parts? Contact Char-Broil customer support immediately for replacement or assistance.
8.1. Can I Assemble the Grill Alone?
Yes, you can assemble the Char-Broil grill alone, but it may be more efficient with a second person to help with larger or heavier parts. Ensure you have a clean, flat workspace and all tools ready. Spread parts on a soft surface to avoid damage and follow the step-by-step instructions carefully. Digital assembly guides are available for clarity, making solo assembly manageable for most users.
8.2. How Long Does Assembly Typically Take?
Assembly time for a Char-Broil grill typically ranges from 1 to 3 hours, depending on the model and your level of DIY experience. Simpler models with fewer features may take about an hour, while larger grills with additional components can require up to 3 hours. Organizing parts beforehand and following digital instructions can help streamline the process. Having a second person assist with heavier parts can also save time and effort.
8.3. What If I Encounter Missing or Damaged Parts?
If you find missing or damaged parts during assembly, contact Char-Broil customer support immediately. Provide your model number and order details for assistance. Do not proceed with assembly to avoid further complications. Most grills are covered under warranty, and replacement parts can be shipped quickly. Always double-check the packaging and inventory list before starting to ensure all components are accounted for and in good condition.