Welcome to the New Home Sewing Machine Instruction Manual! This guide provides essential information to help you understand, operate, and maintain your sewing machine effectively.
1.1 Overview of the Manual’s Purpose and Structure
This manual is your comprehensive guide to understanding and utilizing your New Home sewing machine. It is organized into sections covering machine parts, threading, basic and advanced sewing techniques, maintenance, troubleshooting, and care. Each section provides detailed instructions to enhance your sewing experience, ensuring optimal performance and creativity. Additionally, safety precautions and tips for machine care are included to prolong its lifespan.
1.2 Importance of Reading the Manual Before Use
Reading the manual is crucial for safe and effective operation of your New Home sewing machine. It ensures you understand the machine’s features, proper threading techniques, and maintenance requirements. The manual also provides troubleshooting tips and guidelines to avoid damage. By following the instructions, you can maximize your sewing experience and maintain the machine’s performance over time. Always refer to it before starting any project.
Essential Parts of the New Home Sewing Machine
Understanding the machine’s components is vital for effective use. Key parts include the spool pins, take-up lever, bobbin, and stitch selector. Familiarize yourself with each part to ensure proper operation.
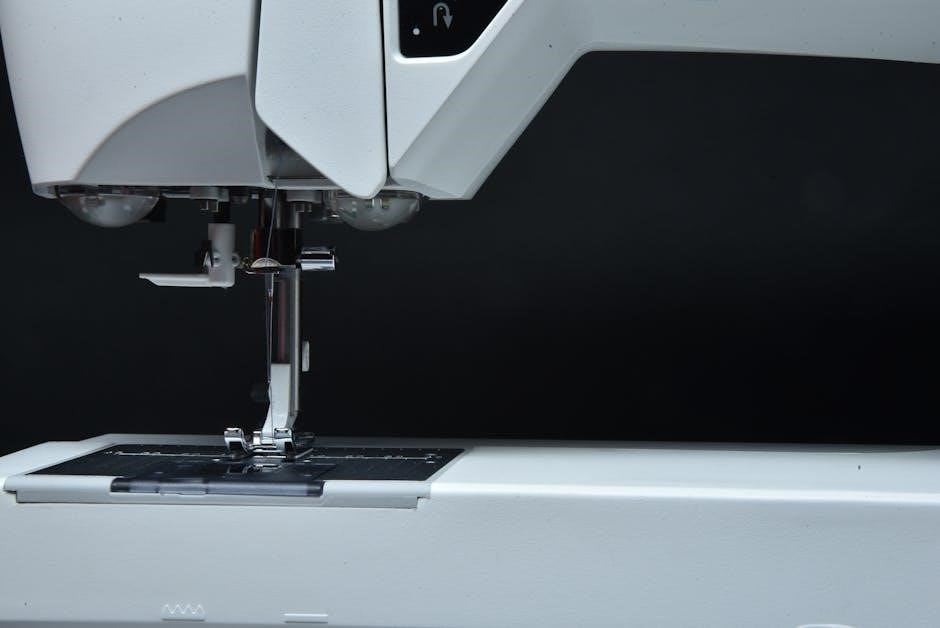
2.1 Identification of Key Components
The New Home sewing machine features essential parts like the spool pin, take-up lever, bobbin, and stitch selector. The needle clamp and thread guide ensure proper threading. Understanding each component’s role helps in operating the machine effectively and troubleshooting issues. Familiarize yourself with these elements to maximize your sewing experience and maintain the machine’s performance. Proper identification is the first step to mastering your sewing machine.
2.2 Understanding the Machine’s Features and Accessories
The New Home sewing machine boasts features like reverse stitching and buttonhole options, enhancing your sewing capabilities. Accessories include a needle set, oiler, screwdriver, and specialized attachments for decorative stitches. These tools and features are designed to improve efficiency and versatility. Familiarizing yourself with them will help you tackle various projects, from basic repairs to intricate designs, ensuring a seamless sewing experience.
Safety Precautions and Guidelines
Always keep children away and avoid loose clothing near moving parts. Ensure the machine is switched off during adjustments or needle changes for safe operation.
3.1 General Safety Tips for Operating the Sewing Machine
Always keep children and pets away from the machine. Avoid wearing loose clothing or jewelry that could get caught; Ensure the machine is switched off during needle changes or adjustments. Keep fingers away from moving parts and use the provided attachments correctly. Maintain a clean, stable work surface to prevent accidents and ensure smooth operation.
3.2 Proper Handling of Needles and Sharp Objects
Always handle sewing machine needles and sharp objects with care to avoid injury. Use the screwdriver provided to change needles safely. Never touch sharp edges or points. Store needles and accessories in a secure, out-of-reach location. Regularly inspect needles for damage and replace them immediately if bent or dull to ensure safe and precise stitching.
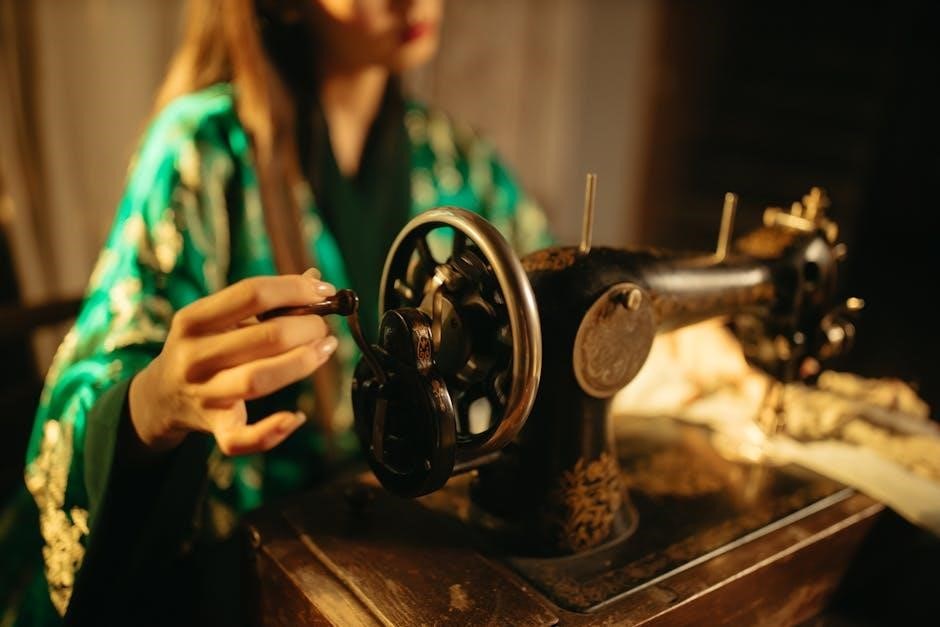
Setting Up Your New Home Sewing Machine
Unpacking, inspecting, and placing your New Home sewing machine on a stable surface are crucial first steps. Ensure the area is clear and well-lit for safe operation.
4.1 Unpacking and Initial Inspection
Begin by carefully unpacking your New Home sewing machine and accessories. Inspect the machine for any visible damage or defects. Verify that all components, such as the power cord, needles, and bobbin, are included. Check the manual for specific unpacking instructions to ensure everything is accounted for and properly prepared for use.
4.2 Placing the Machine on a Stable Work Surface
Place the New Home sewing machine on a sturdy, flat work surface, ensuring it is level and secure. Clear the area around the machine for easy access and fabric movement. Position it near a power source to avoid using extension cords. Ensure good lighting to illuminate your work area for optimal visibility and sewing accuracy. This setup ensures stability and safety during operation.

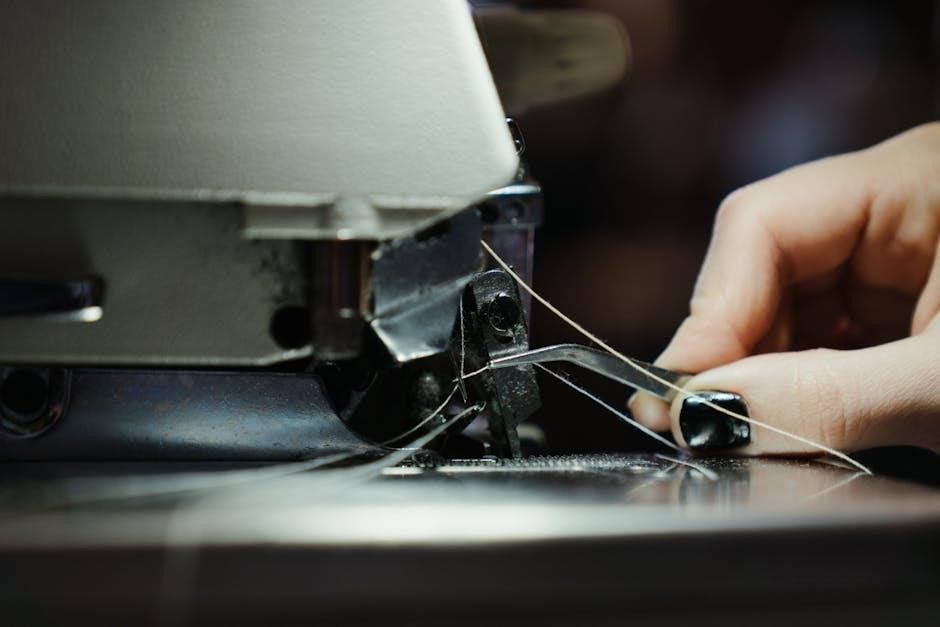
Threading the Sewing Machine
Properly thread your New Home sewing machine by following the guide for the upper thread and bobbin. Ensure the thread is seated correctly in the tension discs and guides. Use the correct thread type for your fabric to maintain smooth operation and prevent breakage. Always refer to the manual for specific threading instructions. Keep the area clean to avoid tangles or jams during sewing. Proper threading ensures consistent stitching and optimal performance. If thread breaks or tensions are uneven, re-thread the machine and adjust the tension discs as needed. Regularly check for thread wear or damage and replace it when necessary. This step is crucial for achieving professional results in your sewing projects. By carefully threading your machine, you can enjoy smooth, even stitches every time. Always turn off the machine before threading to ensure safety. Use the handwheel to raise the take-up lever to the highest position before threading the upper thread. Gently pull the thread to ensure it is seated correctly in the tension spring. For the bobbin, follow the arrows on the machine to wind and insert it properly into the bobbin case. Ensure the bobbin thread is evenly wound and not overlapping. After threading, test the machine by sewing on a scrap piece of fabric to check stitch quality and tension. Adjust the upper or bobbin thread tension as needed to achieve a balanced stitch. Proper threading is essential for preventing common issues like thread breakage or uneven stitching. Always use high-quality thread suitable for your fabric type to ensure the best results. Threading your machine correctly will save time and reduce frustration during your sewing projects. If you encounter difficulties, refer to the troubleshooting section of the manual for guidance. Keep the manual handy for quick reference when threading or adjusting your machine. With practice, threading your New Home sewing machine will become a quick and easy process. Remember to clean any lint or debris from the thread path after threading to maintain your machine’s performance. Proper threading ensures your New Home sewing machine operates efficiently and delivers professional-quality stitches. Always follow the manufacturer’s guidelines for threading to extend the life of your machine and ensure optimal performance. By mastering the threading process, you can unlock the full potential of your New Home sewing machine and enjoy sewing with confidence. If you are unsure about any step, consult the manual or seek guidance from an experienced sewer. Threading your machine correctly is the foundation for successful sewing projects. Take your time and ensure each step is done accurately to avoid common mistakes. With the right technique, threading your New Home sewing machine will become second nature. Always inspect the thread for any knots or tangles before sewing to ensure smooth operation. By following the manual’s threading instructions, you can achieve consistent results and enjoy a seamless sewing experience. Threading your machine properly is the key to unlocking its full potential and creating beautiful, professional-quality projects.
5.1 Step-by-Step Guide to Threading the Upper Thread
Turn off the machine for safety. Locate the spool pin on top and place the thread spool securely.
Gently pull the thread through the tension discs or guides, ensuring it is seated properly.
Bring the thread down to the take-up lever, sliding it in without twisting.
Thread the needle, possibly using a needle threader for ease.
Pull the thread to create a small loop at the end.
Check the tension by gently tugging on the thread and adjust if necessary.
Raise the take-up lever to its highest position using the handwheel.
Test the threading by sewing a few stitches on scrap fabric to ensure even stitches and proper thread tension.
5.2 Properly Threading the Bobbin and Lower Thread
Remove the bobbin case and insert a new bobbin, ensuring it is seated correctly.
Wind the thread around the bobbin evenly, leaving a small tail.
Secure the thread by pulling gently and cutting the excess.
Place the bobbin into the bobbin case and pull the thread through the slot.
Attach the bobbin case to the machine and ensure it clicks into place.
Gently pull the lower thread to check tension and ensure smooth operation.
Basic Sewing Techniques for Beginners
Learn essential sewing skills, including straight stitching, backstitching, and fabric handling. Adjust thread tension and troubleshoot common issues to ensure smooth sewing experiences from the start.
6.1 Starting Your First Sewing Project
Begin by familiarizing yourself with the machine’s basic functions. Choose a simple fabric like cotton and ensure the machine is properly threaded. Start with a straight stitch, adjusting the stitch length and width as needed. Practice on scrap fabric before sewing your actual project. Always keep the sewing area clean and well-lit for better visibility. Refer to the manual for specific settings and troubleshooting tips to ensure a smooth start.
6.2 Practicing Straight Stitch and Backstitch
Start with a straight stitch by selecting the correct stitch option on your machine. Adjust the stitch length and width as needed for your fabric type. For the backstitch, reverse the machine’s direction at the beginning and end of your seam to secure it. Practice these stitches on scrap fabric to ensure even stitching. Keep the work area clean and well-lit for accuracy. This builds foundational sewing skills.
Stitch Selection and Fabric Compatibility
Understand your fabric type and choose the appropriate stitch. Delicate fabrics require lighter stitches, while heavier materials need stronger, denser stitching for durability and stability.
7.1 Understanding Different Stitch Types
Your New Home sewing machine offers various stitch types, including straight stitch, backstitch, and buttonhole stitch. Each stitch serves a specific purpose, ensuring versatility for different fabrics and projects. The straight stitch is ideal for general sewing, while the backstitch reinforces seams. Buttonhole stitches are perfect for creating precise buttonholes. Understanding these stitches enhances your sewing experience and project outcomes.
7.2 Choosing the Right Stitch for Your Fabric
Selecting the appropriate stitch type for your fabric is crucial for optimal results. Cotton and linen fabrics work well with straight and backstitches, while delicate fabrics like silk require a zigzag or stretch stitch. Heavy-duty fabrics, such as denim, benefit from reinforced or heavy-duty stitches. Always consult your manual to ensure the stitch type matches your fabric, ensuring strong and professional-looking seams.
Maintenance and Care of the Sewing Machine
Regular cleaning and lubrication are essential to ensure your sewing machine runs smoothly. Follow the manual’s guidelines for proper care to maintain performance and longevity.
8.1 Regular Cleaning and Lubrication
Regular cleaning and lubrication are essential to maintain your sewing machine’s performance. Use a soft brush to remove dust and lint from the bobbin area, tension discs, and needle bar. Apply a few drops of sewing machine oil to moving parts, such as the handwheel and bearings, to ensure smooth operation and prevent rust. Clean and oil regularly to keep your machine in optimal condition.
8.2 Scheduled Maintenance for Optimal Performance
For optimal performance, schedule regular maintenance every 3-6 months. Clean the bobbin area, check the needle and hook for wear, and ensure all parts are well-lubricated. Re-oil moving components and inspect belts for tension. Replace worn or damaged parts promptly. This routine ensures your machine runs smoothly and extends its lifespan. Always use recommended oils and follow the manual’s guidelines for professional servicing if needed.
Troubleshooting Common Issues
Identify and resolve common problems like thread breakage, uneven tension, or machine noise. Refer to the manual for step-by-step solutions to ensure smooth operation and extend machine life.
9.1 Resolving Thread Breakage and Tension Problems
Thread breakage and tension issues are common problems. Always ensure the machine is turned off before adjusting threads. Check for loose connections or tangled threads. Properly re-thread the machine, following the manual’s guidelines. If tension remains uneven, consult the troubleshooting section for detailed solutions to restore optimal stitching quality and prevent further damage.
9.2 Addressing Noise or Vibration Issues
If your machine produces unusual noise or vibration, switch it off immediately. Check for obstructions like loose threads or debris. Ensure all parts are securely tightened. Regular lubrication of moving components can reduce friction and noise. Place the machine on a stable surface to minimize vibration. Consult the manual for additional troubleshooting steps if issues persist.
Accessories and Attachments for Enhanced Sewing
Discover a variety of accessories and attachments designed to enhance your sewing experience. From specialized presser feet to decorative stitch guides, these tools expand your machine’s capabilities and creativity.
10.1 Overview of Available Accessories
The New Home sewing machine offers a wide range of accessories to enhance your sewing experience. These include various presser feet, such as zipper, buttonhole, and blind hem feet, as well as specialized attachments for decorative stitching. Additional accessories like needles, bobbins, and thread guides are also available to ensure optimal performance. These tools are designed to expand your machine’s capabilities and make sewing easier and more versatile.
10.2 Using Specialized Attachments for Decorative Stitches
Specialized attachments for decorative stitches on your New Home sewing machine can enhance your creativity. Use the stitch guide for precise alignment and the quilting guide for uniform patterns. Attachments like the zipper foot and blind hem foot are ideal for specific techniques. Ensure proper fitting by aligning the attachment with the machine’s shank and securing it firmly. Adjust machine settings as recommended for optimal results. Practice on scrap fabric to master various decorative stitches before applying them to your projects. This will help you achieve professional-looking finishes and explore the full potential of your machine’s decorative capabilities.
Advanced Sewing Techniques
Master advanced sewing techniques to enhance your projects, such as sewing buttons, zippers, and creating decorative stitches. Explore specialized attachments for intricate designs and fabric manipulation.
11.1 Sewing Buttons and Zippers
Learn to securely attach buttons and zippers using your New Home sewing machine. The manual provides clear steps for aligning fabric, threading properly, and using the right stitches for a professional finish. Specialized feet and settings ensure accurate placement and durability, making these tasks effortless for both beginners and experienced sewists.
11.2 Creating Decorative Stitches and Embellishments
Enhance your projects with decorative stitches and embellishments using your New Home sewing machine. The manual guides you through selecting and customizing stitches, adjusting thread tension, and using specialized attachments. Learn to create intricate patterns, embroidery, and appliqué. Tips on maintaining stitch quality and exploring creative possibilities ensure your sewing projects stand out with professional-style detailing and personal flair.
Downloading and Accessing Digital Manuals
The Importance of the Instruction Manual
Your instruction manual is key to mastering the sewing machine. It provides safety tips, troubleshooting guides, and maintenance advice, ensuring optimal performance and longevity of your machine.