
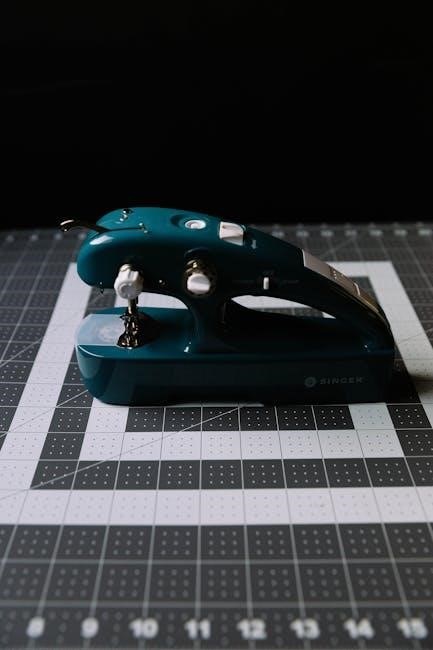
Singer 15-91 Sewing Machine Manual: A Comprehensive Guide
This manual, dating back to 1950s-60s, details the Singer 15-91’s operation, maintenance, and repair; a testament to Singer’s enduring legacy since 1851.
Historical Context of the Singer 15-91
The Singer 15-91 emerged during a pivotal era for home sewing, roughly between the 1950s and 1960s. Following Isaac Singer’s 1851 patent for the first practical sewing machine, Singer solidified its position as a household name. The 15-91 represented a refinement of earlier designs, offering a robust and reliable machine for a growing post-war consumer market.
This model wasn’t simply a functional tool; it symbolized a shift towards accessible, convenient home crafting. It empowered individuals, particularly women, to create and mend clothing independently. The 15-91’s durability and straightforward mechanics contributed to its widespread popularity, becoming a staple in countless homes; Singer’s commitment to quality, established since its inception, is clearly reflected in the enduring appeal and continued use of this iconic machine even today.
The Significance of the 15-91 Model
The Singer 15-91 holds a significant place in sewing machine history due to its blend of simplicity, durability, and capability. Unlike some modern machines, it’s entirely mechanically operated, fostering a deeper understanding of the sewing process. This model’s robust construction, utilizing primarily metal components, ensured longevity, making it a reliable workhorse for decades.
The 15-91’s straightforward design also made it relatively easy to maintain and repair, contributing to its enduring popularity. It wasn’t just a machine; it was an investment. Its ability to handle a variety of fabrics and sewing tasks cemented its reputation as a versatile and dependable tool for both novice and experienced sewers, embodying Singer’s long-standing commitment to quality.
Dating Your Singer 15-91 Machine
Determining the manufacturing date of your Singer 15-91 involves examining the machine’s serial number. These machines were primarily produced from the late 1940s through the 1960s, but pinpointing the exact year requires careful observation. The serial number is typically located on a plate affixed to the machine’s body, often near the handwheel or on the base.
While a definitive serial number-to-date chart isn’t universally available, resources online and within Singer enthusiast communities can assist in narrowing down the production timeframe. Earlier models generally have lower serial numbers. Understanding the serial number provides insight into the machine’s history and can be helpful when sourcing correct replacement parts or accessing period-specific documentation.
Understanding the Machine’s Components

The Singer 15-91 boasts a robust, mechanical design; featuring a handwheel, flywheel, bobbin winder, needle system, and presser foot – all crucial for operation.
Identifying Key Parts: A Visual Guide
Familiarizing yourself with the Singer 15-91’s components is paramount for successful sewing and maintenance. Key areas include the handwheel, controlling fabric movement, and the flywheel, providing momentum. The bobbin winder is essential for preparing the lower thread, while the needle and presser foot system secures fabric during stitching.
Observe the stitch length regulator, adjusting stitch size, and the stitch width lever, controlling zigzag width. The tension discs regulate thread tension, crucial for balanced stitches. Locate the reverse lever for backstitching and the spool pin, holding the thread spool. Don’t overlook the feed dogs, advancing fabric, and the throat plate, guiding the needle. Understanding these parts, often detailed in instruction books, ensures proper machine function and longevity. Referencing diagrams within the manual aids identification and comprehension.
The Handwheel and Flywheel Assembly
The handwheel and flywheel assembly are central to the Singer 15-91’s operation, converting power into precise stitching. The handwheel, turned manually or by a motor, drives the needle up and down. The flywheel’s weight provides momentum, ensuring smooth, consistent movement, even during slower operation.
Proper function relies on a secure connection between the wheel and the driving shaft. Regularly check for looseness or damage. The flywheel’s rotation synchronizes with the needle’s action, creating the stitch. Understanding this assembly is vital for controlling sewing speed and preventing mechanical issues. Lubrication, as detailed in the manual, is crucial for smooth operation and longevity. Inspecting these components during routine maintenance ensures optimal performance and prevents potential breakdowns.
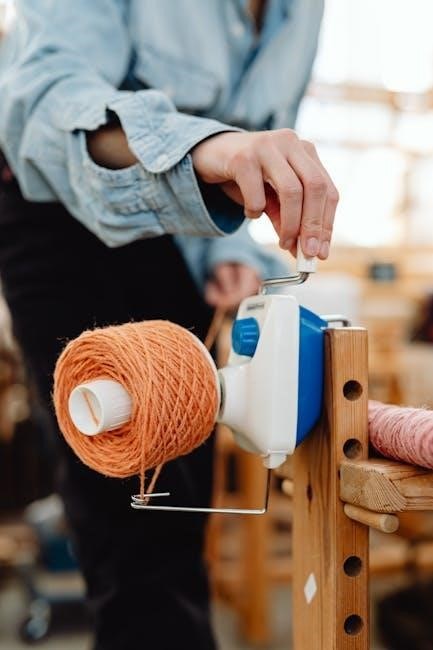
The Bobbin Winder Mechanism
The Singer 15-91’s bobbin winder is a crucial component, ensuring a consistently filled bobbin for uninterrupted sewing. This mechanism utilizes friction to wind the thread evenly onto the bobbin. Engaging the winder typically involves moving a lever, disengaging the needle, and applying gentle pressure with the thread against the bobbin.
Correct tension is paramount for even winding; too loose results in uneven layers, while too tight can cause breakage. The manual details adjustments for thread type and bobbin size. Regularly cleaning lint from the winder prevents jams and ensures smooth operation. A properly wound bobbin is essential for balanced stitch formation and preventing thread nests. Familiarity with this mechanism is key to maintaining consistent sewing quality.
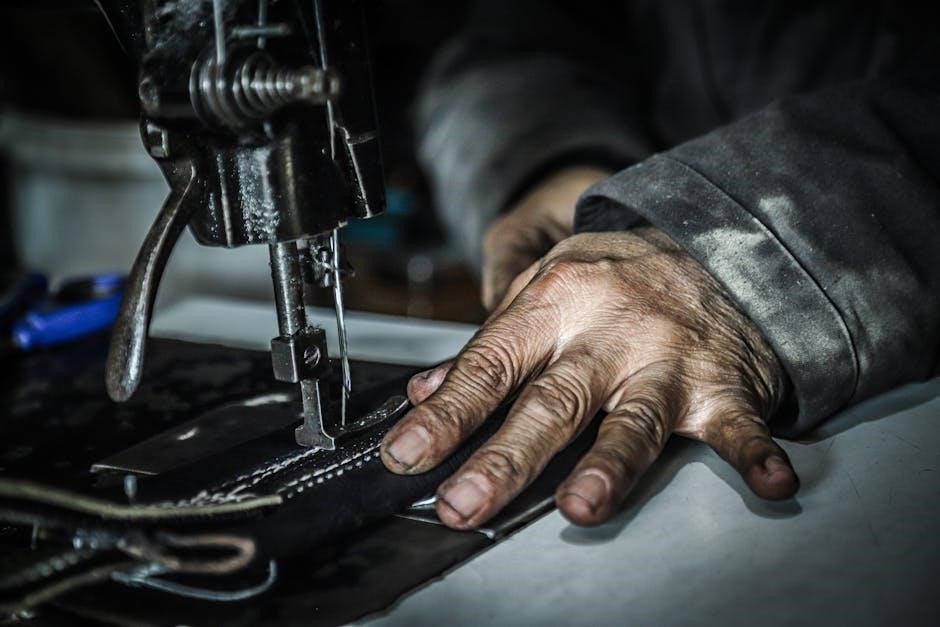
Needle and Presser Foot System
The Singer 15-91’s needle and presser foot system work in harmony to create consistent stitches. The manual emphasizes selecting the correct needle type – size and shape – based on fabric weight and type. Proper needle insertion is vital; it must be fully inserted into the clamp. The presser foot applies pressure, guiding the fabric evenly.
Adjusting presser foot pressure is crucial for delicate fabrics, preventing puckering or slipping. Different presser feet are available for specialized tasks like zippers, buttonholes, and darning. Maintaining a clean and smooth foot surface ensures fabric glides freely. Understanding this system allows for precise control and optimal stitch quality, enhancing your sewing projects.
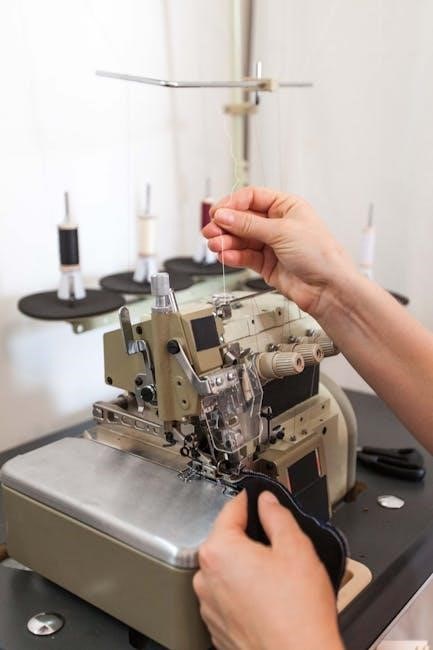
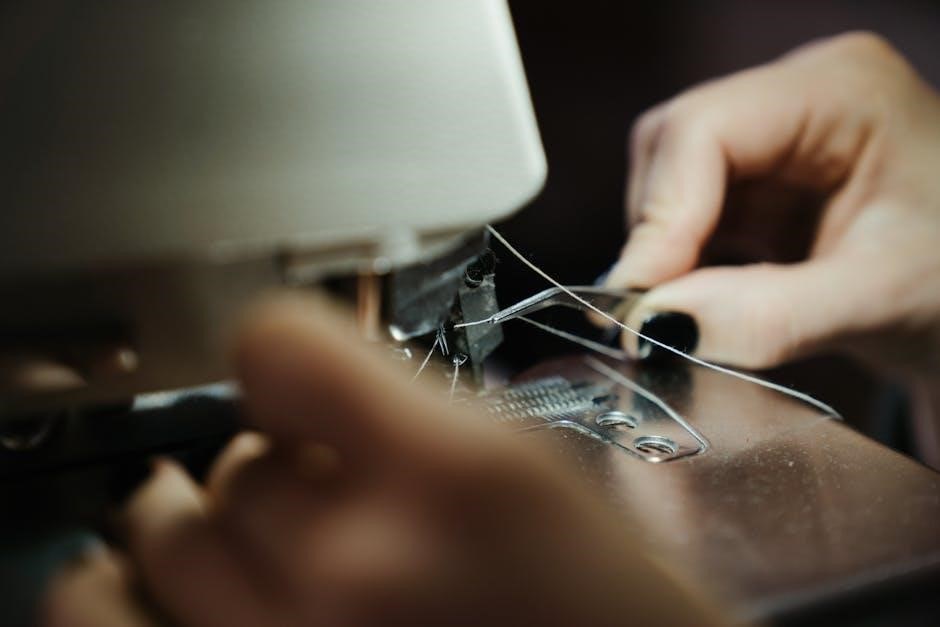
Threading the Singer 15-91
Correct threading—upper and lower—is fundamental for proper operation. The manual provides detailed diagrams illustrating the precise path for both threads, ensuring smooth feeding.
Upper Threading Instructions
Begin by ensuring the machine is unplugged or the handwheel is stationary. Place the spool of thread onto the spool pin, securing it with a spool cap to prevent unwinding. Guide the thread through the first thread guide, located above the spool. Next, draw the thread down and around the tension discs – this is crucial for stitch quality.
Continue threading upwards, passing the thread through the take-up lever. Ensure the thread is properly seated in the lever’s groove; From the take-up lever, lead the thread down through the second thread guide and then through the needle clamp. Finally, thread the needle from front to back. A properly threaded machine, following these steps, will minimize tension issues and ensure consistent stitch formation. Refer to the manual’s diagrams for visual clarification, as precise routing is essential.
Lower Threading (Bobbin) Instructions
Begin by placing a spool of thread on the bobbin winder spindle. Secure the thread end with a cap. Engage the bobbin winder by pushing it to the right; Wind the bobbin evenly, stopping when full. Remove the bobbin and place it into the bobbin case, ensuring it rotates freely and clicks into place.
Now, insert the bobbin case into the shuttle hook. Guide the thread through the tension spring on the bobbin case, then draw it up and slightly to the left. Gently rotate the handwheel towards you to catch the thread with the hook. A correctly threaded bobbin is vital for balanced stitches. Always check the manual’s illustrations for accurate placement and tension adjustment, as improper threading leads to looping or skipped stitches.
Troubleshooting Threading Issues
If experiencing threading problems, retrace each step carefully. Ensure the presser foot is raised, as this releases tension discs. Verify the thread is properly seated in all guides and the take-up lever. A common issue is the thread not being fully inserted into the bobbin case tension spring.
For skipped stitches, confirm the needle is correctly inserted and not bent. If the lower thread bunches, check bobbin winding tension and ensure the bobbin is inserted correctly. Always use quality thread appropriate for your fabric. Refer to the manual’s diagrams for visual guidance. Persistent issues may indicate a need for cleaning or professional servicing.
Basic Operation and Stitch Selection
The Singer 15-91 operates via hand crank or motor, offering stitch length and width adjustments; it boasts a versatile range of common stitch types.
Powering the Machine (Hand Crank/Motor)
The Singer 15-91 is remarkably versatile in its power options, originally designed for hand-crank operation but readily adaptable to electric motor use. When utilizing the hand crank, ensure a smooth, consistent motion for even stitching – a slower pace allows for greater control, particularly with thicker fabrics or intricate designs.

For those opting for motorized operation, a standard Singer motor can be easily attached. Proper alignment is crucial for efficient and quiet running. Always verify the motor’s voltage compatibility with your local power supply. The foot pedal controls the sewing speed, offering precise regulation.
Regardless of the power source, always ensure the machine is securely mounted on a stable surface. Regular checks of the belt tension (if using a motor) are essential for optimal performance. A loose belt can cause inconsistent stitching, while an overly tight belt can strain the motor.
Selecting Stitch Length and Width
The Singer 15-91 offers adjustable stitch length and width, providing versatility for various sewing applications. Stitch length is controlled by a dial located on the machine’s front, allowing you to choose between shorter stitches for delicate fabrics and longer stitches for heavier materials or gathering. Experimentation is key to finding the optimal length for your project.
Width adjustment, similarly managed by a dial, determines the zigzag width. A narrower width creates a straight stitch, while increasing the width produces a wider zigzag, ideal for finishing raw edges or decorative stitching.
Understanding these controls is fundamental to achieving professional-looking results. Always test your stitch settings on a scrap fabric before beginning your project to ensure the desired appearance and prevent potential issues. Consistent stitch selection contributes significantly to the overall quality of your work.
Common Stitch Types Available
The Singer 15-91, despite its vintage, boasts a surprisingly versatile range of stitch options. Primarily, it excels at straight stitching, the foundation for most sewing projects, offering consistent and reliable results. Beyond the straight stitch, the 15-91 is capable of producing a variety of zigzag stitches, crucial for finishing seams, creating buttonholes, and applying decorative elements.
Adjusting the width dial allows for variations in zigzag width, from a narrow satin stitch to a wider zigzag for stretch fabrics. The machine can also perform a reinforced stitch, ideal for areas needing extra durability. While not computerized, the manual control provides precision.
Mastering these basic stitch types unlocks a world of creative possibilities, enabling you to tackle diverse sewing endeavors with confidence and skill.
Maintenance and Troubleshooting
Regular cleaning and oiling, as detailed in the manual, are vital for the 15-91’s longevity; addressing common issues ensures smooth, reliable operation for years.
Regular Cleaning Procedures
Maintaining a clean Singer 15-91 is crucial for optimal performance and preventing mechanical issues. Dust, lint, and old oil accumulate during use, hindering smooth operation. Begin by disconnecting the power source – either removing the hand crank or unplugging the motor. Use a soft brush, ideally one specifically designed for sewing machines, to gently remove lint from the bobbin area, feed dogs, and around the needle plate.
A small vacuum cleaner with a brush attachment can also be helpful, but avoid using compressed air, as it can push debris further into the machine. Wipe down the exterior surfaces with a slightly damp cloth. For stubborn grime, a small amount of sewing machine oil can be applied to the cloth. Never use harsh chemicals or abrasive cleaners, as these can damage the machine’s finish. Regular cleaning, ideally after each use or every few projects, will significantly extend the life of your Singer 15-91.
Oil Points and Lubrication
Proper lubrication is vital for the Singer 15-91’s longevity and smooth operation. Locate the designated oil points – typically found on the bobbin case, shuttle hook, and along the machine’s moving parts. Use a high-quality sewing machine oil, applying it sparingly with an oiler. Avoid over-oiling, as excess oil attracts dust and lint.
A few drops at each point are sufficient. After oiling, operate the handwheel slowly to distribute the oil evenly. Pay close attention to the areas where metal parts rub against each other. Regularly wiping away excess oil prevents buildup. Refer to the machine’s diagram (if available) for precise oil point locations. Consistent lubrication, combined with regular cleaning, ensures your Singer 15-91 continues to perform reliably for years to come, upholding Singer’s reputation since 1851.
Addressing Common Sewing Problems
Several issues can arise with the Singer 15-91, but many are easily resolved. Thread bunching often indicates incorrect threading or improper tension. Re-thread both the upper and lower threads, ensuring they follow the correct paths. If the needle breaks frequently, use the correct needle size for your fabric and ensure it’s properly inserted.
Skipped stitches can stem from a dull or bent needle, or incorrect timing. Clean the bobbin area to remove lint buildup. If the machine seizes, do not force it; check for obstructions and lubricate moving parts. Remember Singer’s legacy since 1851 – with patience and careful troubleshooting, most problems can be overcome, keeping your machine running smoothly.
Advanced Techniques & Accessories
Explore darning, freehand embroidery, and utilize various presser feet to expand your creative possibilities with this versatile Singer machine.
Using Different Presser Feet
The Singer 15-91’s adaptability is significantly enhanced by its range of compatible presser feet. These accessories unlock a wider spectrum of sewing applications beyond basic straight stitching. A standard zig-zag foot is essential for creating decorative stitches and sewing stretch fabrics, offering greater stitch control and preventing puckering. For buttonholes, a dedicated buttonhole foot ensures consistent and professional-looking results, guiding the fabric precisely. A rolled hem foot is invaluable for delicate fabrics and creating fine, decorative edges.
Furthermore, a zipper foot allows for close-in stitching along zipper teeth, providing a neat and professional finish. Quilters will appreciate a quilting foot, designed for even stitch distribution and managing multiple fabric layers. Exploring these specialized feet transforms the Singer 15-91 from a reliable workhorse into a versatile creative tool, enabling intricate projects and personalized designs. Finding these accessories expands the machine’s capabilities exponentially.
Darning and Freehand Embroidery
The Singer 15-91 excels in traditional techniques like darning and freehand embroidery, showcasing its versatility beyond standard sewing. Darning, used to repair holes in fabric, is facilitated by lowering the feed dogs, allowing free movement under the needle. Employing darning wool or matching thread, create a woven patch over the damaged area. For freehand embroidery, the same principle applies – disengaging the feed dogs grants complete control over fabric positioning and stitch placement.
Utilize various embroidery floss colors and stitch types, achievable through the machine’s stitch width and length adjustments, to create intricate designs. The Singer 15-91’s robust construction and consistent stitch quality make it ideal for these detailed crafts. Experiment with different presser feet, like an embroidery foot, for enhanced precision. These techniques breathe new life into garments and offer a creative outlet for personalized textile art.
Available Accessories for the 15-91
The Singer 15-91’s functionality is greatly expanded through a range of available accessories, enhancing its capabilities for diverse sewing projects. Essential additions include a variety of presser feet – a zipper foot for precise zipper insertion, a buttonhole foot for consistent buttonholes, and a rolled hem foot for delicate edging. Bobbin cases and needles in assorted sizes are crucial for working with different fabric weights.
Additional accessories encompass a seam ripper for correcting mistakes, a lint brush for cleaning, and a screwdriver for maintenance. Authentic Singer accessories, though potentially vintage, offer superior quality and compatibility. Modern equivalents are available, but verifying fit is recommended. Finding these accessories often involves online marketplaces or specialized sewing machine repair shops. Investing in these tools unlocks the full potential of your Singer 15-91, allowing for greater creativity and precision.
Finding Replacement Parts
Locating parts requires identifying specific part numbers, often found in the manual or online resources, and sourcing them from online retailers or repair services.
Identifying Part Numbers
Successfully acquiring replacement parts for your Singer 15-91 hinges on accurately identifying the correct part numbers. These numbers are crucial for ensuring compatibility and avoiding frustrating mismatches during the repair process. The original Singer 15-91 manuals, often available online through resources like archive.org, frequently contain detailed exploded diagrams illustrating each component with its corresponding part number.
However, these manuals can sometimes be difficult to decipher or may be missing pages; In such cases, numerous online communities and forums dedicated to vintage sewing machines can be invaluable resources. Experienced Singer 15-91 enthusiasts often share part number lists and identification guides. Websites specializing in vintage sewing machine parts also provide searchable databases and diagrams to assist in pinpointing the correct components. When searching, be as specific as possible with your description of the part, and cross-reference information from multiple sources to confirm accuracy.
Sourcing Replacement Parts Online
The internet offers a wealth of options for sourcing replacement parts for your Singer 15-91 sewing machine. Several dedicated websites specialize in vintage sewing machine components, offering a wide selection of parts specifically for the 15-91 model. eBay is another excellent resource, frequently featuring both new-old-stock (NOS) parts and used components salvaged from donor machines.
When purchasing online, carefully review the seller’s feedback and return policy before committing to a purchase. Pay close attention to the part description and compare it to your machine’s needs, verifying the part number if possible. Consider the shipping costs and estimated delivery time, especially if you require the part urgently. Websites like Singer’s official site also occasionally feature compatible accessories and parts, though primarily for newer models, it’s worth checking for universal components.
Repair Services for Singer 15-91 Machines
For owners uncomfortable with self-repair, professional repair services are readily available for the Singer 15-91. Numerous technicians specialize in vintage sewing machine restoration and repair, possessing the expertise to diagnose and fix a wide range of issues. Online directories and local sewing machine shops can help you locate qualified repair professionals in your area.
When selecting a repair service, inquire about their experience with Singer 15-91 machines specifically, and request a quote before authorizing any work. Discuss the problem in detail and ask about turnaround time and warranty options. Shipping your machine safely is crucial; ensure it’s properly packed to prevent further damage during transit. Some services offer mail-in repair options, while others require local drop-off and pick-up.