
Making 3 oz Jello is a simple, quick process perfect for any occasion. It requires basic materials like boiling water, cold water, and a Jello packet. Customizable with fruits or molds, it’s ideal for desserts or snacks, ensuring a fun and delicious treat for everyone.
Overview of Jello Preparation Basics
Preparing 3 oz Jello involves dissolving the gelatin mix in boiling water, then combining it with cold water to achieve the perfect texture. The process typically starts by mixing the Jello powder with 1 cup of boiling water, stirring until fully dissolved. Once the gelatin is dissolved, 1 cup of cold water is added to cool the mixture and help it set. The mixture is then refrigerated for about 3-4 hours, or until firm. This basic method ensures a smooth, jiggly texture that can be customized with added flavors or fruits. It’s a simple, versatile dessert ideal for any occasion.
Materials Needed for 3 oz Jello
A 3 oz Jello package, 1 cup of boiling water, and 1 cup of cold water are the essential materials required for preparation.
1 package of 3 oz Jello (any flavor)
A 3 oz Jello package is the foundation of your dessert, providing the color and flavor. Choose any variety to match your preference. This size is ideal for standard recipes, requiring 1 cup of boiling water and 1 cup of cold water. Ensure you use only one package, as excess can make the Jello overly sweet or dense. For a lighter taste, opt for unsweetened or sugar-free options. This package size is perfect for small gatherings or personal use, offering the right balance of flavor and texture. Always store unused packages in a cool, dry place to maintain freshness.
- Essential for achieving the desired flavor profile.
- Perfect for small-scale preparation.
- Customizable to suit dietary preferences.
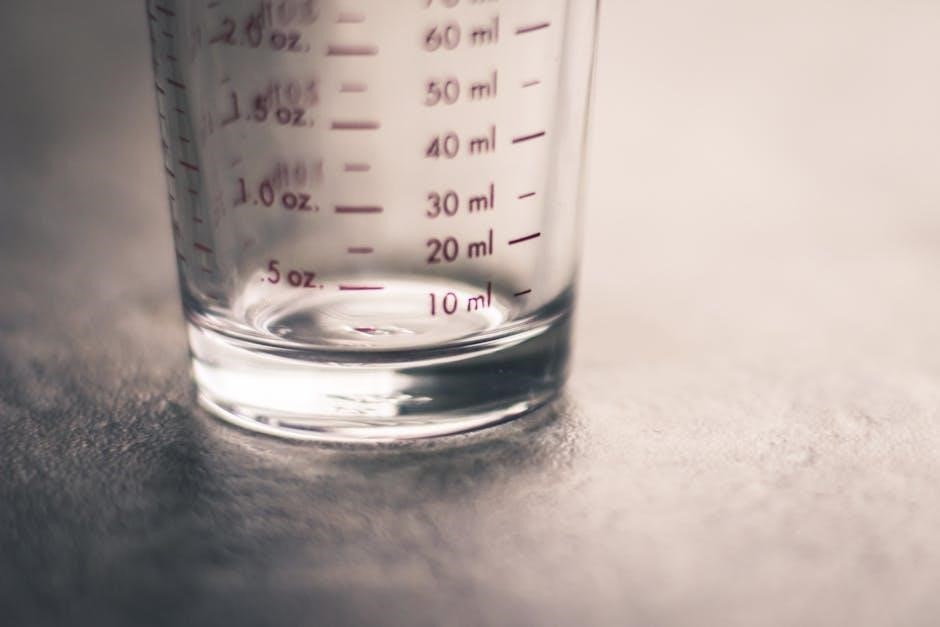
1 cup boiling water
Boiling water is crucial for dissolving the gelatin mix evenly. Pour 1 cup of boiling water over the Jello powder in a bowl. Ensure the water is at a rolling boil to activate the gelatin properly. Stir continuously for about 2 minutes until the powder is fully dissolved and no lumps remain. Avoid using water that’s not hot enough, as it may not dissolve the gelatin completely. For best results, use fresh boiling water and avoid re-boiling, as it can reduce effectiveness. This step sets the foundation for a smooth, even texture in your final Jello dish.
- Essential for proper gelatin activation.
- Ensures a smooth, lump-free texture.
- Must be freshly boiled for optimal results.
1 cup cold water
Cold water is added after dissolving the Jello mix in boiling water to lower the temperature and prepare the mixture for setting. Use fresh, cold water (not ice water) to avoid diluting the mixture too much. Stir well after adding the cold water to ensure even distribution. This step helps the Jello reach the right consistency without being too runny. The cold water step is crucial for achieving the desired texture. For best results, use filtered or chilled water to maintain flavor purity. Avoid using ice cubes, as they can water down the mixture excessively. This balances the Jello’s texture perfectly.
- Helps achieve the ideal Jello consistency.
- Prevents the mixture from being too runny.
- Ensures even flavor distribution.
Step-by-Step Instructions for Preparing 3 oz Jello
Dissolve the Jello mix in 1 cup of boiling water, stirring for 2 minutes. Add 1 cup of cold water, mix well, and refrigerate for 3-4 hours to set.
Dissolving the Gelatin Mix
To dissolve the gelatin mix, start by pouring 1 cup of boiling water into a medium bowl containing the 3 oz Jello packet. Stir the mixture continuously for about 2 minutes until the gelatin is fully dissolved and the mixture is smooth. Ensure there are no lumps or undissolved particles. Some recipes suggest using 3/4 cup of boiling water for a slightly firmer texture. Stir until the sugar and gelatin are completely incorporated, creating a clear, syrupy consistency. This step is crucial for achieving the right texture in your final Jello dish. Proper dissolving ensures a smooth and even set later on.
Adding Cold Water and Ice
After dissolving the gelatin mix, add 1 cup of cold water to the mixture. To speed up the cooling process, some recipes suggest adding ice cubes to 1/2 cup of cold water, making a total of 1 1/4 cups of chilled liquid. Stir gently to combine, ensuring the ice melts evenly without creating air bubbles. This step helps lower the temperature of the Jello mixture, preparing it for refrigeration. The cold water aids in setting the Jello properly and gives it a firmer texture. Make sure the mixture is well-stirred before proceeding to the next step. This ensures a smooth and even consistency throughout.
Refrigeration and Setting Time
Pour the Jello mixture into a mold or serving dish and refrigerate. Allow it to chill for 3 to 4 hours, or until firm. The Jello will set when it becomes solid and no longer jiggles when gently shaken. For best results, avoid disturbing it during this time. Once set, it’s ready to serve. If using a mold, dips the bottom in warm water for easy removal. Proper refrigeration ensures the Jello develops a smooth texture and holds its shape. Be patient, as rushing the process may result in a soft or runny consistency. This step is crucial for achieving perfectly set Jello every time.

Tips for Customizing Your Jello
Add fruits like berries or citrus for extra flavor and texture. Use molds to create fun shapes. Experiment with flavors by adding extracts or spices for uniqueness.
Adding Fruit or Flavor Enhancements
Enhance your 3 oz Jello by incorporating fresh or canned fruit, such as berries, citrus slices, or mandarin oranges, for added texture and flavor. For a tropical twist, mix in pineapple or mango. You can also substitute cold water with fruit juice, like pineapple or grapefruit, for a sweeter taste. Layering Jello with fruit creates a vibrant, visually appealing dessert. Experiment with spices or extracts, such as cinnamon or vanilla, for unique flavor profiles. Ensure fruit is well-drained to avoid affecting the Jello’s set. These customizations make your Jello more engaging and personalized for any occasion.
Using Molds for Creative Shapes
Using molds is a fantastic way to add creativity to your 3 oz Jello. Silicone molds are ideal for achieving intricate designs and shapes. Pour the Jello mixture into the mold before refrigeration. For themed events, choose molds like hearts, stars, or animals. Ensure the mold is clean and dry to prevent sticking. After setting, gently flex the mold to release the Jello. For multi-colored effects, layer Jello in the mold, allowing each layer to set before adding the next. This method allows you to create visually stunning desserts that match any occasion, making your Jello stand out as a centerpiece or individual servings.
Safety and Storage Considerations

Always refrigerate Jello after preparation to ensure food safety. Store it in an airtight container and consume within 3-5 days for freshness. Keep it away from direct sunlight and heat sources to prevent melting or spoilage. Before serving, check for any signs of spoilage, such as an off smell or slimy texture. Proper storage and handling will maintain its quality and safety for everyone to enjoy.
Food Safety Guidelines
When preparing 3 oz Jello, ensure all utensils and surfaces are clean to prevent contamination. Use fresh, cold water and store Jello in the refrigerator at 40°F (4°C) or below. Consume within 3-5 days of preparation. Always check for spoilage before serving, such as an off smell or slimy texture. Keep Jello away from direct sunlight and heat sources. Wash hands thoroughly before handling ingredients. For gatherings, serve Jello in shallow containers to maintain even cooling. Avoid cross-contamination by using separate serving spoons. Store leftovers in airtight containers to maintain freshness and prevent mold growth.
Proper Storage of Prepared Jello
Store prepared Jello in an airtight container in the refrigerator at 40°F (4°C) or below to maintain freshness. Use a clean, covered container to prevent contamination and absorb odors from other foods. Keep Jello away from direct sunlight and heat sources, as this can cause melting or degradation. Once set, refrigerate immediately and consume within 3-5 days for optimal taste and texture. Do not leave Jello at room temperature for extended periods, as it may spoil or develop mold. For longer storage, ensure the container is sealed tightly to prevent air exposure and moisture loss.

Troubleshooting Common Issues
If Jello doesn’t set, ensure proper water ratios and avoid over-stirring. Insufficient boiling water or incorrect dissolving can prevent setting; retry with adjusted measurements for better results.
Why Your Jello Might Not Set Properly
If your Jello doesn’t set properly, it could be due to insufficient boiling water or adding too much cold water, which prevents the gelatin from binding correctly. Overstirring or not dissolving the mix thoroughly can also cause issues. Using outdated gelatin or improper ratios of water to gelatin mix may result in a runny texture. Additionally, adding cold ingredients too quickly or refrigerating it unevenly can disrupt the setting process. Ensuring accurate measurements and following instructions carefully helps achieve the perfect Jello texture every time.